Dry Fitting Saxophone Pads
By Curt Altarac
Dry fitting is the process of bending a pad cup to function perfectly for the pad you will install while keeping the pad cup itself level. There are a number of key bending methods; we will discuss a few here that have worked for us in the MusicMedic.com repair shop. No matter what method you use to bend the pad cups, you must remember that metal has a memory and will want to bend back to it's original position. Knowing this, you may want to bend the metal a little too far and then bend it back to stabilize, or wait for the metal to flex back and continue working with it. In our shop, we use both of these methods. We try and stabilize any bends but, realizing that any stabilization is an approximation, we are certain to check the metal in the following days.
It is also important to note that the function of bending is not to alter the key from it?s original position. When bending a pad cup, we are setting the pad cup up to the pad that we have put in the cup. There may be a time when bending for the purpose of altering the instrument is necessary but these occasions are certainly rare. When you place several pads in pad cups without adhesive in the instrument, you will quickly see that many techs before you have bent the pad cups. That is, one pad on the stack will leak at the top, another at the bottom, one in front and so on. Although your pads are of a consistent thickness your leaks will appear random. If your pads are consistent in thickness, you can be confident that these pad cups have been bent in the past. Hopefully you will also see that repairing these cups will make your job a lot easier.
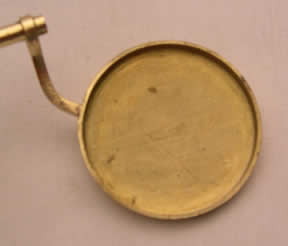
1. Clean the pad cup removing all traces of the old shellac.
2. Be sure that Variables 1, 2 and 3 have been addressed from this article: Four Variables of Sax Pad Installation.
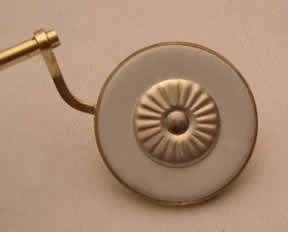
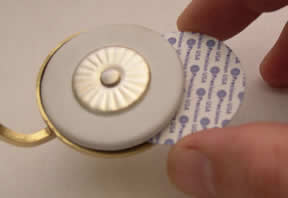
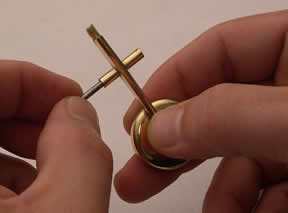
3. Find a pad that fits snugly, but is not forced, into the pad cup and press it into place.
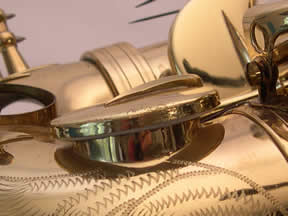
4. Put the key on the instrument.
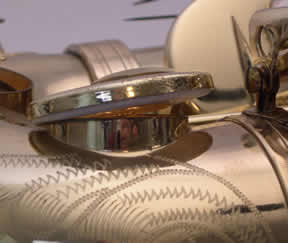
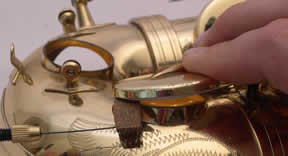
5. With a leak light in the instrument, take note of where the pad is leaking.
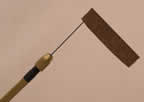
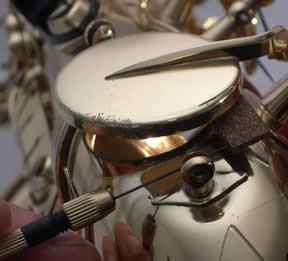
6. First correct the leaks that are on the sides of the pads. You can do this by placing some material (I use 1.6mm TechCork cut into a strip and mounted on a pad prick for this job) under the part of the pad that is hitting the tone hole first and bend the pad cup into place. We call this tool a pad flag.
7. When your side leaks are taken care of, you can make a determination about the the thickness of the pad.
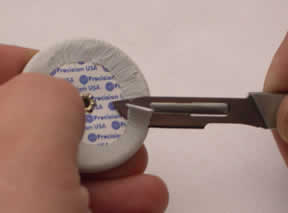
If the pad is hitting in the back (closed to the hinge), you may need to remove the pad and cut some of the leather off the backing of the pad using a very sharp Scalpel. This will reduce the thickness of the pad and allow the pad to seal. If the pad is only slightly hitting on the back, you can put your pad flag under the back of the pad and bend the pad cup down slightly in the front. This will change the orientation of the pad cup allowing your pad to seal. This technique should be used most often when the pad cup was bent in the opposite direction by a previous repairer. This bending technique is very often abused by technicians to compensate for pads that are much too thick.
If the pad is hitting the tone hole in the front, you may need to put a shim under the pad to make the pad a little thicker. Pull the pad out of the cup and place a shim between the pad cup and the pad. Now check where the pad is hitting first. If it no longer hits in the front first and hits both front and back at the same time, you were successful. If the pad now hits in the back first, before hitting the front, your shim is too thick.
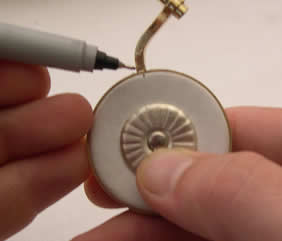
8. Once you have the pad cup orientated to the tone hole mark the pad by making a dot on the back of the pad in the center of the key spine. This dot will insure that the pad goes in the same way every time.
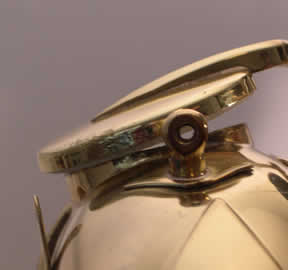
9. Check for damage. After you have oriented the pad cup to the tone hole, check to see if you damaged any of the mechanisms do this. First remove the key and check for binding on the rod. Sometimes bending a pad cup can result in a twisting of the hinge tube introducing friction to the mechanism. If you find any problems that you may have caused in the bending process, you will need to repair them before you move on. With the key off the horn and pad removed check that the pad cup is still level. If it is not, you will need to level it on a bench anvil.
10. With the key functioning properly and the level pad cup, you may want to put the key on the instrument again to check that your dry fitting retained its integrity. If, in the process of leveling the pad cup (the second time) or fixing the key work, you undid your dry fitting to some degree, you will need to start over and dry fit the pad again.
Copyright © 2000-2012
MusicMedic.com
All Rights Reserved