Removing Needle Springs
By Curt Altarac
Removing and replacing needle springs is a common task in woodwind repair. There are many ways to remove a needle spring, the method you choose will depend on how firmly the spring is pressed into the post and the condition of the spring. This article will cover four techniques for removing needle springs presented in order of difficulty. When practicing these techniques, take necessary precautions to keep your pliers from marking the posts and be sure that you remove all keys necessary to easily access the spring you are removing.
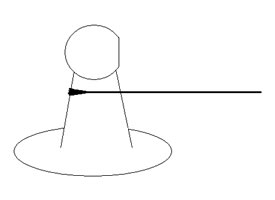
With very few exceptions, Woodwind needle springs are friction fit into their respective posts. The spring goes through a hole in a post. The end of the needle spring is peened (flattened) and pressed into the hole in the post. The peened end is larger than the hole in the post, when pressed into the hole friction holds the spring firmly in place. Because of this, a spring can only be removed from a post in one direction.
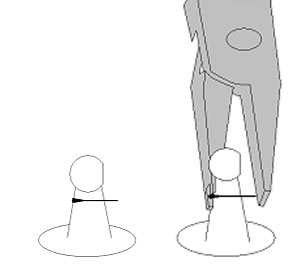
To remove a spring that is in good condition, first grip the spring with a pair of duck billed pliers and gently press it out of the post. This is basically a test to see if the the spring is firmly stuck in the post. Be careful not to bend the post when pressing and do not press too hard. If the spring holds stubbornly in place, and many do, give up on this procedure and move to the next approach. Trying to remove a tight spring with one pair of pliers in this fashion may bend the spring making removal more difficult.
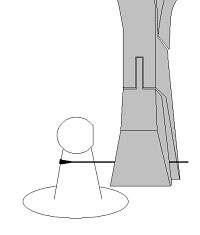
To remove a stuck spring, grip the spring with a small pair of side cutters. Using the side cutters together with a pair of round nose pliers, press the springs out of the post. Again, be careful not to bend the spring or mar the instrument.
If the spring will not budge using the side cutters and round nose pliers. Cut the spring 2-3mm from the post and use the procedure for removing a broken spring that protrudes from the post. Leaving a very short section of spring protruding from the post will prevent the spring from bending.
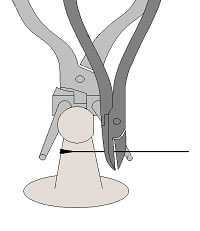
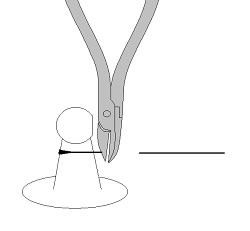
To remove a broken spring that protrudes from the post, use spring removing pliers to press the spring out of the post. Then grip the spring gently from the backside with a small pair of pliers and remove completely from the post.
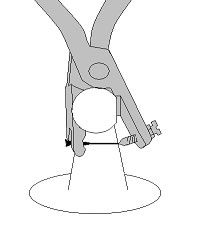
Removing springs that are broken flush with the post can be a very difficult job without the proper tools. A good pair of spring removing pliers is invaluable in this case.
To remove a broken spring with the spring removing pliers, align the pliers with the broken spring from the side or top. Be certain that you know which side of the spring was peened originally. Force the spring out in the opposite direction that it went into the post. When the spring pops loose grab it from the back with a pair of needle nose pliers and remove it from the post.
Copyright © 2000-2012
MusicMedic.com
All Rights Reserved