Fixing a Saxophone Octave Hiss
By Curt Altarac
For saxophonists, the hiss often found on the second octave notes such as octave A, G# and octave D can be a real nuisance. The hiss is most noticeable when playing quietly on a hard reed, and is nearly always accompanied with a feeling of resistance. The change in feel and sound is bothersome and distracting. Luckily, it is easily fixed on most saxophones with this simple repair.
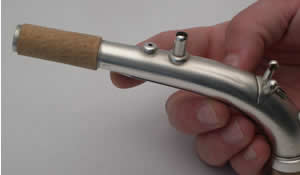
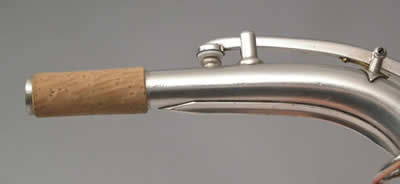
Before we begin, you must understand which of the two octave keys are open when the offending note is played. The first octave key, found lower down the body of the saxophone, is open on notes from 4th line D to top space G#. The neck octave key, or the octave pad that is closest to the mouthpiece, opens from A above the staff and up. Notes most often afflicted with this hiss and resistance are those on the outer edge of a pips 'range'. For example, the second octave pad works from A and up and the worst note is often A; the lowest note controlled by the neck octave. Of the notes controlled by the lower octave pip (from D-G#) the D and G# are usually the most resistant and prone to this hiss. Notes in the middle of the pips range are largely not a problem.
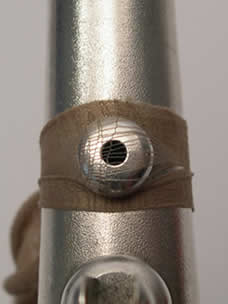
It is simple to diagnose this problem and discover if the repair will work before you begin. First, get some pantyhose and cut a strip about 1” or 25mm wide. Stretch the pantyhose strip over the open octave pip, tying it to the instrument, and play the offending note. If the problem is greatly reduced or disappears, this fix will help you.
If you discover that this solution works, and it usually does, you will need to tie the pantyhose over the octave pip. The pantyhose, however, will cause the octave pad to leak, affecting the response of many notes on the instrument. Do not be tempted to stop here . You will need to make this repair airtight and permanent. What follows is what I currently do to make this fix more permanent. I believe there is a better way than the one I use, but I have not found it. If you have a better method, please contact me.
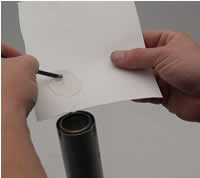
Start with the cheapest pantyhose you can find. Some more expensive pantyhose are sewn in double strands, the cheap ones are single threads. Although either will work, the cheaper pantyhose are easier to work with. To determine which you have, stretch them over your hand and look at the construction of the pantyhose.
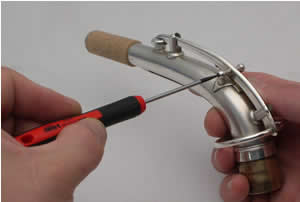
1. Remove the octave key.
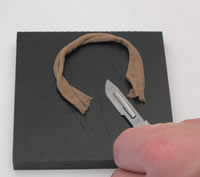
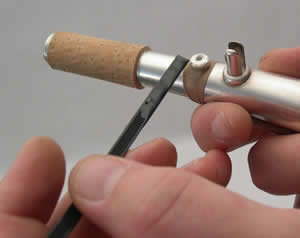
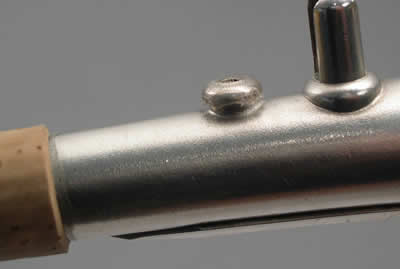
2. Using a sharp knife or bench scalpel, cut the material into a 1" strip. Tie the pantyhose over the pip.

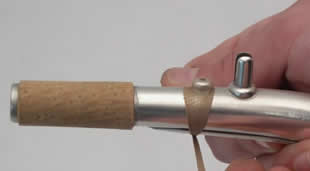
3. Stretch the pantyhose so there are only about 5 strands going over the pip.
4. Get some high quality 5 minute epoxy and mix it up. Be sure to follow the directions on the label and wear safety goggles.
5. Using an Air Torch or other heat source, add some heat to the epoxy. This will thin the epoxy, allow it to mix more thoroughly and make it set up hard and remove any air bubbles. Hold the epoxy over the heat while it is on heavy paper pallet. Be careful here, the epoxy will get thin and run. Do not heat it up too much, just heat the epoxy until it begins to thin out.
6. Quickly add a little epoxy on the pantyhose make sure to get it on the edges AND in the middle over the pip. A small amount of epoxy on the strands over the pip's hole will strengthen the fibers and make them waterproof.
7. With your safety goggles on, quickly hold one hand over the large end of the neck and blow in the small end. The epoxy on the fibers over the hole will blow off but the remaining epoxy on the fibers will strengthen then and keep them from fraying. Be sure that you are blowing the epoxy onto a surface that it will not harm. Of course, you would not want to suck this epoxy into your lungs.
8. Make sure that the epoxy fills in the pantyhose grooves and is not in the pip. Also be certain that the epoxy surrounding the hole in the pip appears to be even and smooth. Although it is possible to sand this epoxy flat the embedded fibers may be damaged. It is best to reach a nice level surface with your epoxy when wet.
9. Wait and let the epoxy set hard. Prop the neck up into an upright position allowing the epoxy to set level.
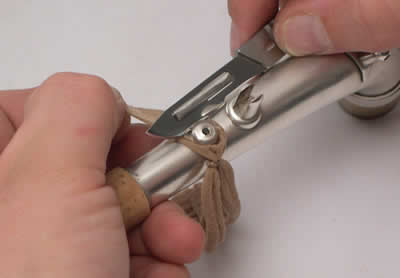
10. After several hours, cut the pantyhose from around the edges of the pip leaving only a screen over the pip and the entire pip covered with pantyhose.
11. Install a new pad that will now seal on the epoxy layer. For this, I prefer RooPads as they are the least sticky and form the nicest seal on the new surface.
12. Using your mouth as suction or the MusicMedic Leak Tester perform a leak test on the neck.
13. Now, play test the horn paying attention to the response of each note. Too much material in the pip will inhibit response. Too little will not resolve the hiss. If this is your first time trying this trick, you may have to add or remove material, to do this just start over.
Once done, the repair should be nearly invisible and leak free, the hiss should be gone and the notes that were a problem should “feel better” with less resistance.
Copyright © 2000-2012
MusicMedic.com
All Rights Reserved