A Discussion of Pearl Heights as it Relates to Saxophone Set-Up
By Curt Altarac
One of the most common set of problems I see on saxophones is the height and angle and even sometimes the shape of the pearl key touches. Student instruments can be terribly awkward right from the manufacturer and are usually left that way. Even manufacturers of professional instruments seem to have overlooked this important aspect on some of the finest instruments I see. Often, when the pearls are addressed as part of the Set-Up, there is a unique or creative change made by the technician. A modification of sorts. I see it in modern instruments where the B pearl in the left hand top stack is lower than the A Pearl, which is lower than the G Pearl. Selmer Series III's use this set up from the factory. I find this to be a cumbersome way to play. The greatest saxophone pearl heights are essentially even when the keys are pressed. This article will address the slight variations to many of the pearls, but these changes don't work unless it is your intention to keep the pearls equidistant from the body when the keys are pressed.
As the geometry of various saxophones change from size to size, make to make, and model to model, so does the feel of the left-hand (top stack) and the right hand (bottom stack). This is most noticeable on vintage instruments and more recently on modern instruments such as Selmer and those who have copied Selmer.
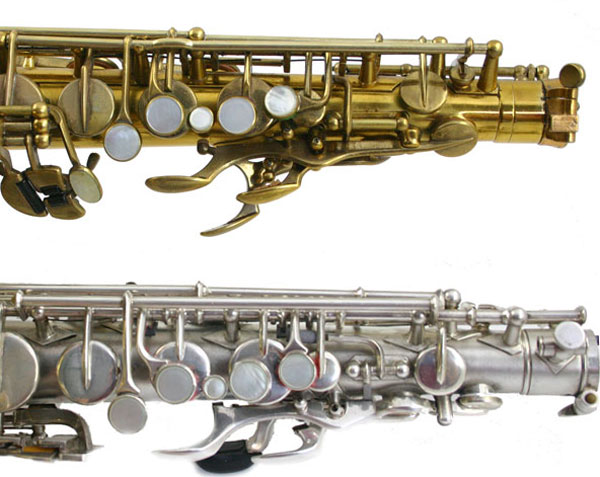
When considering pearl heights as well as the angle at which they come in contact with the player's fingers, all saxophones basically feel best with the same set up mentioned above and outlined below. However, there are some differences between vintage in-line saxophones and modern style saxophone that must also be addressed.
Vintage In-line Saxophone Left Hand Stack
Before considering doing any work to change the feel of any saxophone, especially a vintage in-line saxophone, you must consider how the instrument is played. In-line instruments, such as a Conn, are often held differently and each size is held even a little differently still. Hook the instrument to a neck strap and play it to feel the pearls. Always refer to this prior to making adjustments.
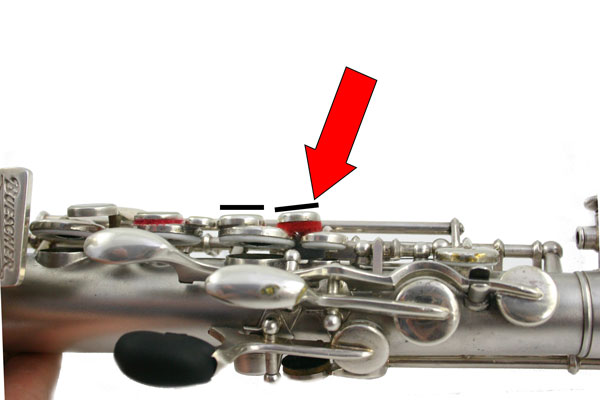
The first pearl on many vintage in-line saxophones is the Front F pearl. The Front F pearl did not get much attention nor was the concept highly evolved in vintage in-line instruments. Often the pearl is too far from the B Key. How the pearl would be approached by the player was never considered by the manufacturer, and often they are just too hard to push. Every pearl can be made to feel good as far as the pressure it takes to push it is concerned. However, that discussion is the topic for a different article. Most vintage Front F's have one or all of the following problems as far as its location: they are too high and too far away from the B key; they are angled awkwardly, being both difficult to rock to as well as difficult for the player to lift their finger and press; and the shape of the pearl, convex or concave, seems to be chosen based on aesthetics or material available.
To set the location of the Front F Pearl, consider where you want your finger to be when the key is activated. There will inherently be a slight compromise due to the pearl's current location and the amount of modification which can be done without cutting and soldering.
Before (Pearl in a bad location):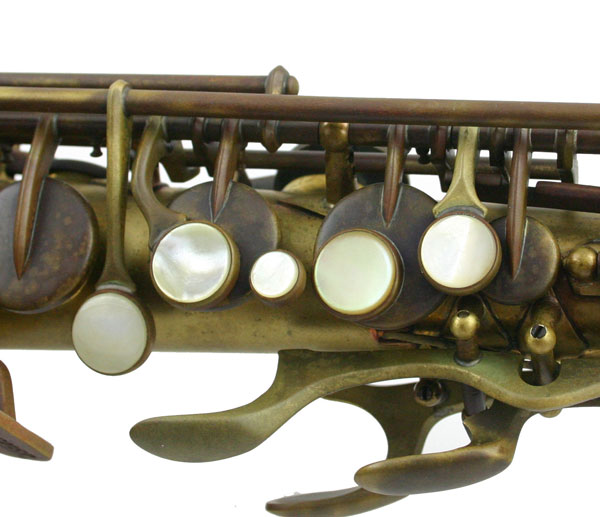
After (Pearl bent to a good location):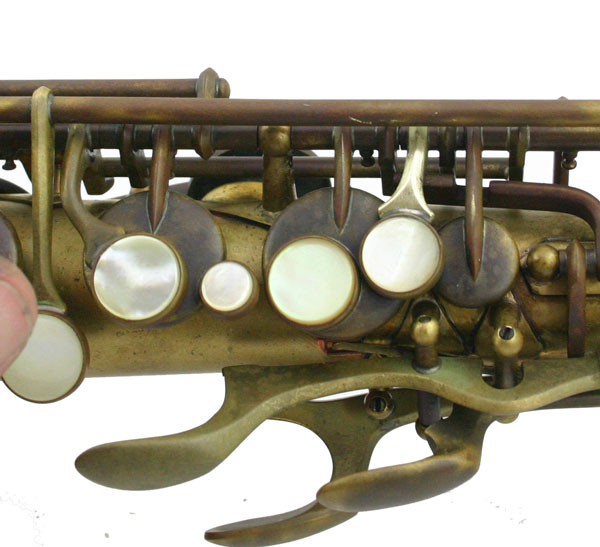
Most players prefer a Front F with which they can tilt or roll their index finger upwards to activate rather than lifting their finger to press. Even those players who tilt, however, will appreciate when Front F can comfortably be pushed directly downward. In general, seek to put your Front F in a place where the player can easily perform either activation method.
In the down position, the Front F pearl should be level to the height of the B pearl, if not slightly below. Take note of any sharp edges on the bottom side of the metal pearl holder or the pearl itself. Now that you will be rolling to the Front F, a smooth transition will be appreciated. In some instances, the thickness of the Front F pearl holder will prevent you from setting it at the same height as the B pearl. If you determine that achieving this even height will improve the feel, you may decide to file away material on the back of the Front F pearl holder. This will allow you ample room to lower the Front F pearl and still use a soft material between the Front F pearl holder and the C pad cup.
Often when an instrument is being set up to roll up to the Front F, changing from a concave pearl to a convex pearl is advantageous. This change allows the finger to smoothly ease up to the Front F in a rolling motion. The most useful position for rolling to Front F is a downward tilted convex pearl where the backside is higher than the B pearl and the front side is lower than the B pearl.
The next pearl down the line is the B pearl. Vintage or modern, most instruments are very similar from this point, with the desired feel of the B pearl being largely the same. Of course, some vintage instruments will require extra work. This is in part due to design and in part due to variations in design. As you know, there is the modern system and then there is trying else.
There are times on some instruments where the B pearl is disconnected from the pad cup and on its own arm, usually on large instruments such as bass and baritone. When the B Pearl is soldered directly to the pad cup, there is no adjusting its feel or location without removing it. Removing the B pearl holder is not something I would suggest as necessary. However, as the B pearl is the only pearl on the stack which almost never moves, its fixed location and angle will largely determine the location and angle of the rest of the pearls in the stack.
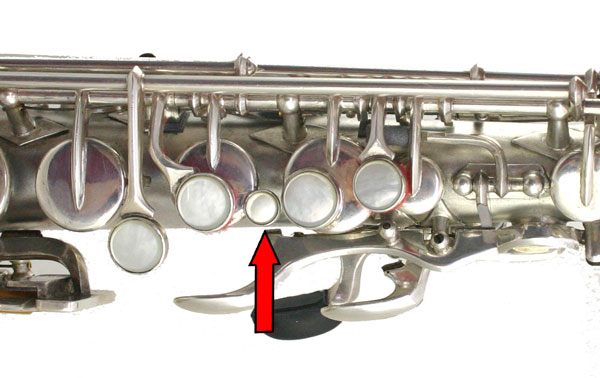
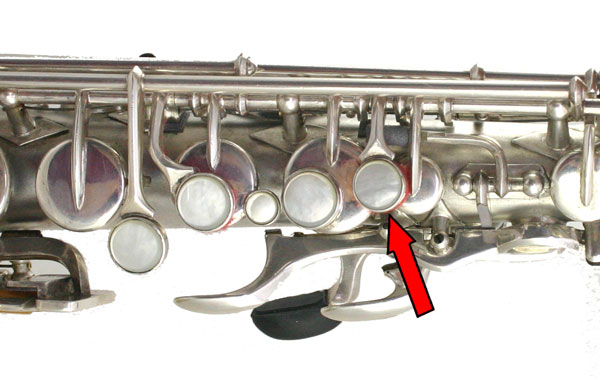
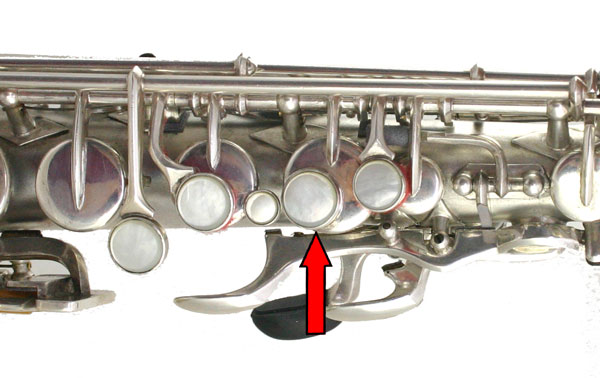
The next pearl down the stack is the bis Bb pearl. The bis Bb pearl must be level with the B pearl when both keys are in the downward pressed position. Some people like to roll down from B to bis Bb. To help these players, the addition of a convex pearl in the bis Bb key and the removal of all sharp edges on the side of the bis Bb pearl and pearl holder closest to the B Pearl is necessary.
Note that on many vintage instruments, the bis Bb pearl is far too small, convex, and often there is a big gap between the bis Bb pearl and the B pearl. Consider the amount of key travel, the bis Bb pearl's location in relation to the B pearl, the diameter of the bis Bb pearl, and the way the player approaches that pearl to determine if moving or changing the bis Bb pearl is necessary. Should you decide to close the gap between the B pearl and the bis Bb pearl, note that when the travel of the key is great, and the player likes to roll to the bis Bb pearl from the B pearl, there must be a sufficient gap between the bis Bb pearl and the B pearl. Simply bringing the two very close together will not work.
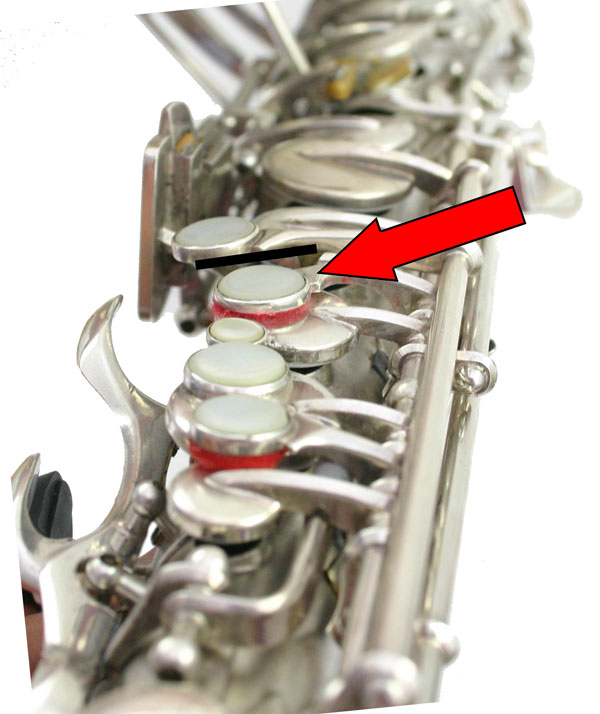
The next pearl down the line is the A pearl that closes the bis Bb pad. On most saxophones, the height of the A pearl is too high. The A pearl is left high to allow space for a thick felt. On many modern style saxophones there is a key arm behind the A pearl which hits the bis Bb pad cup. On either vintage in-line saxophones or modern saxophones, the A pearl should be level with the B pearl and the Front F when all these keys are pressed. Because the A pearl floats above the bis Bb key, the angle that it sits at can be adjusted. It can tilt at a 45 degree angle or it can sit parallel to the B pearl in every way. I greatly prefer the A pearl to slope downward toward the body, naturally following the curve of the player's hand. This slope seems like a minor adjustment, but the final feeling to the player can be one of great comfort. To achieve this angle it is sometimes necessary to alter the key shape.
With vintage in-line saxophones, a greater slope improves the feel to the player. On modern saxophones, however, the A pearl is best set to be nearly parallel to the B pearl.
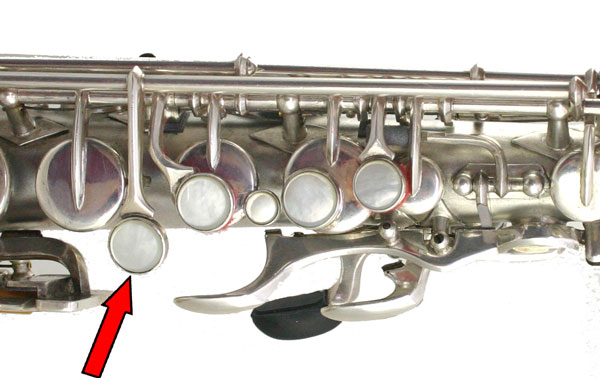
The G pearl is the last of the top stack. The G pearl can be adjusted exactly as the A pearl was. Most G pearls have a sharp angle as they were originally designed. The front of the pearl is the first thing to touch the players finger. Bending the front of the pearl down toward the body as you did with the A pearl greatly improves the feel of the entire left hand.
In summary, when all of the pearls in the left-hand top stack are even, it's possible to roll up to the Front F from the B key or roll down to the bis Bb. The A key pearl is the same height as the B key pearl, but it has a slight downward tilt which makes it more comfortable. The G key pearl also has a slight downward tilt. On in-line saxophones this tilt is more pronounced.
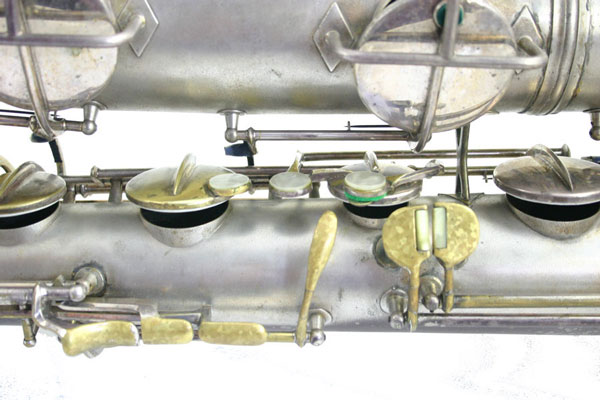
Right Hand Stacks
There is very little that can be done with the pearls on the bottom stack of most saxophones. Bottom stack pearls are usually soldered directly to pad cup. This renders them un-adjustable. However, many vintage baritones and basses have bottom stack pearl holders which are free from the pad cups and mounted on their own key arms. In these instances, the pearl holders and their angle can be adjusted. For some vintage instruments such as vintage Conn and Buescher baritones, this adjustment can greatly improve the feel. Exactly as the top stack A and G keys were curved downward toward the body, the bottom stack keys can be curved in the same manner. The result is a more comfortable feel.
Some instruments, especially vintage Conn and Buescher tenors and larger, have a pearl spread which is too great. That is, the distance between the pearl touches is so great that the player must use an uncomfortable hand position to play the instrument. In these instances it is often best to modify the touches so they are closer together. Sometimes the feel of an instrument can be greatly improved simply by bending key touches. However, there times when there are more factors involved such as the placement of other keys actuated by that same hand. For example, the side Bb and side C and the Low C and Eb must all be actuated by the right hand, and in some cases, the pearl touchpieces will have to compromise with these other keys unless major modifications are to be done. The process of modifying this wide spread is a more detailed topic, possibly a good subject for a later article. I mention it because it is important to note that some instruments still will not feel great even when the pearl angles and spring tensions are correct.
In fact, there are many aspects that play a role in creating a properly set-up saxophone. Many players are playing on instruments where the pearls are worn down, often through the pearl holders which creates sharp edges. Spring tensions are not set well and key heights are also incorrect. Setting the pearls of a saxophone is one step along the way to creating an instrument that feels and plays its best. As a technician, you may not have time to perfect the stacks and the angles of every pearl on every instrument you work on. However, hopefully you have time to consider the feel of the instrument's pearls and its primary interaction with the player, as you run your fingers down the horn. Once you know what you are looking for, many of the adjustments listed above take longer to explain than implement.
Copyright © 2000-2012
MusicMedic.com
All Rights Reserved